Showing posts with label modifications. Show all posts

Sunday, August 1, 2010

Packing Woes and Gadget Triumphs

It’s been a while since my last update simply because I'd rather be out riding than tapping away at the keyboard. I’ve been out riding throughout Southern Ontario and visited some interesting towns and cities. In June, my bike and I visited Barrie, Beaverton, Bellevile, Hamilton, Innisfil, Kingston, Lagoon City, Lindsay, Orillia, Owen Sound, Port Perry, Strathroy, Tobermorray, Woodstock, and countless small towns and villages.

I’ve been riding regional roads and the 400 series highways – all in preparation for the Big Trip. I’m leaving on Friday and I know I’m mentally ready, but I have concerns about my equipment.

My helmet has had many add-ons over the last month. I have weather stripping around the inside of the visor in an attempt to cut down on the noise. I have electrical tape over every almost every join in the plastic. I’ve also added electrical tape to the outside sun visor, as I found that it was the source of a lot of wind noise. It’s now to the point where I’ve taken off the sun visor all together. I was also getting really fed up with tightening the screws every time I flipped it up. If I didn’t it would fall down. I’m not happy when it does that while I’m night riding.

The big Saddlemen bag was a total waste of money. I’ve only had it loaded up maybe four times and the thing is falling apart. It suffers from both poor design and poor quality.

My biggest concern – as well as the products biggest flaw – is the zipper. First of all, it’s not waterproof. I made a waterproof cover by cutting down a tarp and fitted it using tape. I hope it will keep the worst of the rain out, but “they” don’t sell waterproof tape in Canada, so I may wind up with wet clothes. The other problem with the zip is that it is supposed to take all the weigh of the bag when it’s lifted up. The handle is attached tot he top and the top is zippered to the side. While I like top-loading bags, too much weight on the zipper will result in zipper failure. So far it has failed twice. In an effort to salvage the bag, I purchased a new strap/handle from Lee Valley tools. The strap now supports the bag from the bottom – and the handle is much more comfortable than the original.

I’ve decided that I’m going to buy a trailer I can haul behind the motorcycle. I won’t have to worry about security, water tightness, or if the thing will fall apart in a month or two. Of course I’ve run out of time, so I will put that off for the next Big Trip.

My biggest packing headache is the motorcycle cover. I bought one that will cover the bike with the big pack on the back. In other words, it’s huge. I hope to keep prying eyes and fingers off the bike and bag when it’s parked. It will also keep it dry (for the most part) overnight after I’ve check into the hotel. It’s so big that I’ll have to bungee cord it to the top of my big pack to transport it. Luckily it comes in a sturdy bag so I won’ have it trailing behind me as I ride.

I’m taking a few gadgets with me to help be stay safe, happy and on the right roads. I have a weather alert radio to steer me clear of bad weather. I’ve seen the Prairie skies go from black to chocolate milk brown. I would hate to be on a bike when that storm hits. I’ve also heard tales of the emerald green sky, which is something I’d really love to see, but not experience, if you know what I mean.

My iPod will keep me happy for many hundreds of kilometres of riding, and it sounds fantastic. I’ve filled it right up so I’ll have a good variety of tunes while I’m on the go. Finally, the GPS is working well. I won’t need it on all the time. It’s great for finding the right road, but as I will be riding mostly on a few highways, there isn’t much chance of getting lost. The cities and towns will be where I’ll need it, and that won’t be a problem. It just doesn’t like the skyscrapers of downtown Toronto. The signal bounces around so much that it puts me on the wrong the street. Of course I’ve packed maps of all the provinces and cities I’ll be visiting, so even if the GPS send me in the wrong direction, I’ll quickly sort myself out.

Thursday, July 1, 2010

Wooden Beaded Seat adds Comfort to my Motorcycle

Like many riders, after hours on a stock saddle, riding becomes uncomfortable and is a pain in the butt. I had read about gel pads, custom seats, sheepskin, and wooden beads, which all claim help alleviate the pain.

I had seen drivers with wooden beaded seats and couldn’t quite wrap my head around sitting on something hard to make a ride soft. I wasn’t about to spend about $50 on wooden beads just to find out that I hated them within five minutes. The Iron Butt people recommend beads, and as they have much more experience and many more kilometres under their wheels than I, then I should seriously consider beads.

The low cost version is the one that drivers use. Off I went to the local Canadian Tire and for $12, not including tax, I had a well made, but rather large, wooden beaded seat. My first inclination was the cut the nylon just larger than the shape of the seat and tie off all ends. I soon realized that this would be impossible after looking at how intricately the three strands of nylon hold the on the beads in place.

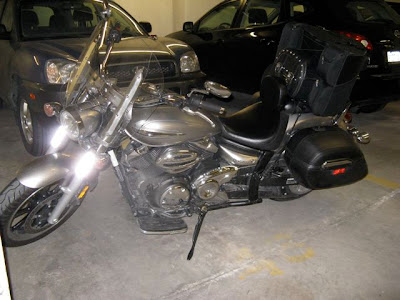
While I was thinking about how to proceed (return the item or get out a knife), I simply laid the beaded seat across my by seat. As you can see from the picture, it was a perfect fit.

I removed the saddle and looped string around the frame, replaced the saddle and then tied the beaded seat to the saddle. Along the back and on the pillion seat I tied the beaded seat to various anchor points, including the saddlebag supports.

With the beaded seat firmly attached I went for a quick trial run and was surprised with how comfortable it is. I’ve had it on my bike for just over a week and have ridden about 800 kilometres. Although a wooden beaded doesn’t look or sound comfortable, it certainly is. It keeps the blood circulating and massages achy muscles as I ride.

I have since replaced the heavy string I used to tie the beaded seat to the bike. It's now tied off with 70 lb test picture frame wire. I've put a bit of electrical tape and black foam under the wire where it touches the saddle so there won't be any wear and tear.

As a bonus, it also stops rainwater from pooling under me. In my recent ride to Halliburton I returned to the city in a soaking downpour. I usually wind up sitting in a puddle when it rains heavily, but not when I’m sitting above the water on a beaded seat.

Saturday, June 12, 2010

A New Backrest for Under $5

Earlier this week I received a new backrest in mail. After a two hour ride with the backrest in place, I knew my chiropractor would hate what I've done. My back was killing me. The backrest offered no lumbar support and pushed me so far forward that I was nearly touching the tank. Very uncomfortable. So, I need the backrest to move back and lower. A good challenge.

Yesterday, I went to Home Depot to look for new bracket ideas to hold the backrest in place. Lo and behold, the much overlooked l-bracket (corner bracket) came to the rescue. I picked up a set of four 3" X 3/4" zinc brackets. They won't rust, which is a plus.

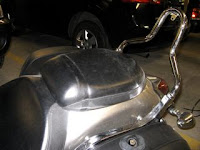
Here's a picture of the bike with the passenger backrest removed. First I removed the front seat (don't get me started on the horrible design of that!) and then undid the two screws that hold the passenger seat to seat bracket. You can find them easily as they are the ones holding down the leather strap that goes across the passenger seat. I'd removed the strap last week, so you won't see it in the picture.


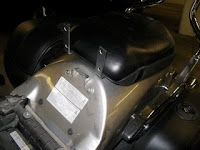
Next, I simply bolted the l-brackets onto the seat using the all the original bolts. No drilling, no fuss. This took me a few minutes as getting under the seat to hold the nuts is a bit of a pain. I tightened everything up and then placed the seat where I wanted it. Now, this is the new seat, not the original passenger seat that came with the bike. I figured that if I mess it up, I'd rather mess up the non-waterproof seat and save the good one.


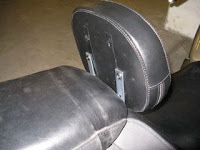
The new seat simply screws into the brackets. The original seat has a metal backing, so you can't drill into it, but the new seat has a wooden back. I drilled 1/8" pilot holes and then screwed the seat to the l-brackets.

The only problem I had was that I couldn't get the two lower screws in because they are right up against the passenger seat. I'll worry about that once I know I have the seat in a good position and my back doesn't hurt.

Once I've worked out the perfect position, I'll remove the new seat and replace it with the original passenger seat. So I wasted $60 on a crappy seat, but in the end I'll wind up with a great seat for less the $5 it cost me for the l-brackets.

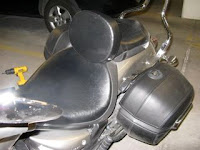
I wanted to make sure my luggage fit with the backrest, so I put most of it on (see below). I will use a 6 foot python lock to hold my luggage down. I thought that using eye hooks instead of regular screws in the backrest would give the python something to lock into. As you can see from the photo below, there isn't enough room for eye hooks. The smaller bag in front of the big one is one of my old saddlebags from the 250. It carries my emergency gear, such as tools, a first aid kit, spare glasses, ear plugs, and the owner's manual. The python goes through that and then through d-rings on the large luggage as well as wrapping around the backrest post. The one thing missing on the bike, besides me, is the tank bag.

Friday, June 11, 2010

Getting Started

In less than two months I'll be on way across the country. I didn't think that getting the bike ready would be a problem as it is only a year old and already has nice, big hardcase saddlebags. Well, I was wrong.

Since I began planning this trip back in March, I've run across several problems, such as what to pack (and not to pack) and how to stay in touch with everyone. Of course selecting proper luggage is part of the issue, which I hope is now solved. So, I have all the luggage, but can I make it all fit on my bike and still carry everything I need?

I'll be gone for about 30 days and ride just over 10,000 km.

That is either going to mean a lot of clothes or a lot of laundry. Frankly, I'd rather spend my time on the road than watching the spin cycle. After much searching, I settled on the biggest piece of luggage I could find, which is the Saddleman BR4100. Apparently, it hold 67 litres of goods. I'm not sure how many t-shirts and jeans that translates into.

Below is the catalogue picture of the luggage. Obviously, I don't have a curved passenger seat, so this will take a bit of farkling to get right.

So far, I've removed the original passenger backrest, which left only the upright post. It looks a bit naked without the backrest, but I will come up with something.

In fact, it took a bit of messing around to get the back rest off. I could plainly see one screw holding it on, but hidden under a plastic plate were two more screws. A quick look on the internet and I discovered the plate is held on by tape. I just popped off the cover with a flathead screwdriver. But why would Yamaha hide screws like that? Not fun for us non-mechanic types.

I made a list of things to get for me (and the bike) as I made up my travel plans. High on the priority list is a backrest.

I found plenty of quick-release backrests, but I really don't see the point of those. After much searching (both in my wallet and online) I found a $60 solution on eBay. It arrived in the mail a couple of days ago. The instructions said it was a 5 minute installation job. Wrong. Including the many times I went up and down 6 flights of stairs for tools I didn't think I'd need, it took an hour and half. If I had just taken all my tools down prior to the backrest project, I'd guess it took about an hour.

To make a long story short, I was out for about two hours yesterday on the bike, and came home with a major backache. This morning, I removed the backrest and am now farkling a farkle. Not sure how I'm going to resolve this issue.

As it is suppose to rain most of the weekend, I'll most likely spend tomorrow getting greasy. With some luck, I'll have the backrest on and comfortable, which, with the help of a python lock, will stabilize my luggage.

I've done a lot of rain-riding this year, so I was really please this morning when my "Rain-off Over Gloves" arrived in the mail today. Finally, (I hope) something that will keep my hands dry without overheating. I don't understand why companies think that it only rains when it's cold. Gor-Tex, if you're reading this, make waterproof, breathable summer gloves. I'm not wearing insulated gloves when it's over 15 C. I'll blog about the over gloves after I've given them a good run for their money.