Tuesday, June 29, 2010

Toronto to Halliburton via Concession Road 507

Time: 9 and a half hours (not including stops)

Distance: 535 km

Date: June 27, 2010

Southern Ontario roads are unique for the how concession and side roads grid this portion of the province. I much prefer this system than the odd mix of concession roads and numerous highways 7, 7A and 7B and crisscross eastern Ontario. I would have been totally lost and disoriented on this ride if not for my GPS.

I haven’t spent much time riding through eastern Ontario, which is mostly forests, sheets of rocks jutting out of the earth along with marshes and swamps that are punctuated by thousands of kilometres of lakes. Oh, yes … and there are some fantastic roads to ride.

My riding buddy and I started in the north east corner of Toronto and headed north into cottage country. Once passed Peterborough, the scenery quickly changes from the rolling farmland into what I describe above. Long winding roads make their way through the wilderness. This is perfect fishing and boating country. Sometimes the road is so close to the road that the water is nearly touching the soft shoulder of the road.

Our destination was Concession Road 507, which I’d heard was a bit twisty with a couple of challenging corners. Twisting it is, but there are no hairpin turns and I easily maintained a good 80 to 70 kilometres per hour even in corners that said 60 and 50.

At times the tress are nice and close the road, which gives an illusion of a tight road. At other times, the black waters of rivers and marshes are at the roadside. One small miscalculation and my bike and I would be swimming.

As the map on the left shows, we didn’t take a direct route to Halliburton, but it was a good 235 kilometre ride. The weather was muggy and with the humidity it felt like it was in the mid 30s, which meant I was cold and rode almost the entire trip wearing my waterproof jacket. I swear I would be cold in the tropics.

The return ride started off great, but about half way back the sky started to look black. We pulled over in Claremont, which is about an hour away from our starting point, and I put on all my rain gear. The map on the left shows our route back to Toronto, which was about 220 kilometres from Halliburton.

It rained steadily all the way back to the city, and that is where the fun started. The rain started to come down so hard that the roads began to floods and drains backed up over the roads because they couldn’t handle such large amounts of water. On one city street I had to drive through a mini lake … the water was washing over the top of my floorboards. In all I drove through three mini lakes and found it impossible to ride in the curb lane of all roads because of flooding.

If you remember, I have the overgloves, which performed fantastically considering the extreme rain. The only problem I had was that I didn’t pull the cinch on my left glove tight enough and rain eventually got in and pooled at the heal of my hand. I have since fixed this problem by tying a loop of string to each cinch. I can now put the loop over my handlebars and pull it nice and tight.

It was a fun, scenic, and challenging ride. Next time, I’d like to do it in nice sunny weather.

Thursday, June 24, 2010

Riding Through Hockely Valley

Time: 5 hours 15 minutes

Distance: 195 km

I forgot to post a nice ride from last week. It was too short and too trafficy, but it’s teaching me how to use my GPS in areas that aren’t filled with city streets.

I started off in west Toronto (Etobicoke) and rode along Lake Shore Blvd West to Port Credit, in Mississauga. Construction on Lake Shore really slowed me down, and as it was a hot and humid day, the last thing I wanted was to be stuck in traffic.

It had been about a year since I drove up Hunontario Street, and thought it would be a quick way to get to Orangeville. I rode through downtown Mississauga (in slow traffic) and then through downtown Brampton (in slow traffic) before the road finally opened up to an 80 km per hour highway. Last year they were repaving most of this, so it was a pleasure to ride on nearly new pavement.

It took about an hour and half to reach Orangeville from Etobicoke, but it was only about 70 km. I really felt that I could have walked quicker at times. After stopping for gas in Orangeville, I head north up highway 10 for a bit and then turned east onto Hockley Valley Road. The last time I’d ridden this long and winding road (insert Beatles music here) the leaves were changing and the air was crisp. Today, the trees along the valley hills were heavy with full foliage, there wasn’t a cloud in sky, and more importantly, I didn’t have a car breathing down my tailpipe.

Coming out of the valley just west of Loretto is always a shock to my eyes. It seems as if one minute I’m in a lush valley and the next minute I’m in open farmland. Next, I rode through Beeton, which, not surprisingly, has a bee and a hive as town’s logo. Beeton flags hung from most of the town’s light poles. They advertised the honey festival, but unfortunately, not one of the flags had the date of the festival.

Just east of Beeton, the road was closed due to a three-car accident and I was forced down number 15 Sideroad. Sideroads are always a bit of a crap shoot, as you never know what the road conditions will be like … and they can change very suddenly. Fortunately, this one was paved, but the patchwork paving made for a bumpy ride.

At the ever busy Highway 9 I turned east. It was time to head home … but which way? Highway 27 is in the midst of repaving. I really don’t like riding on the grooved, ripped up road that is perfectly safe for cars. So I just kept heading east.

From I ride I did last year, I remembered that Dufferin Street was fun, but I couldn’t remember why I thought that. Only one way to find out.

Dufferin Street and Highway 9 do actually meet, unlike what you see on the map. There are houses in the conservation area and the road is shaded by big trees that canopy over the road. And believe me, I’m using the term “road” very loosely here. I came off the highway onto a road with a bit of downward slope. The road then curved quickly to the right. On the turn, pavement disappears. Perhaps underneath the crushed rock, loose dirt, potholes and mud, there was once a paved road. I just call this type of road, ”hard pack” because the ingredients are packed hard together until you actually ride over it.

On grooved pavement I prefer to ride fast so that my tires don’t follow a particular track. I just muscle my way through the road. With hard pack, I take it slow and easy. I’ve almost gone down on this stuff a few times, so I know that it’s a slippery mess.

I couldn’t turn around because the one and half lanes aren’t wide enough for me to turn. Besides, I wouldn’t have any traction, I couldn’t see over the steep, curvy hills to look for oncoming traffic, and I’d be pushing my monster of a bike uphill. Bad combination all around. I also knew that the road improved as I’d ridden it before.

I had a few moments of “oh my god, I’m going to lose it,” but it was a fun four or five kilometres. Once I was through the conservation area, the turned into patchy paving. This area has many equestrian farms, and it was nice to ride through the rolling hills looking at the horses in the field, or horse and riders practising their jumps. But that ended for too quickly and civilization soon swallowed me back up.

It was another long fight through traffic to get home. Next time I’m taking the highway out of the city to get to the country.

Wednesday, June 23, 2010

Rain Off Overgloves Kept my Hands Dry

It finally rained while I was riding. I’ve been looking forward to this for about two weeks, which is how long I’ve had my Rain Off Overgloves in my saddlebag waiting for the right moment.

I have Gor-Tex riding gloves, but as I mentioned in a previous post, they are insulated and just not suitable for summer riding. I will of course take these gloves with me on the Big Trip, but more for their warmth and not water resistance abilities. Last time I went through Roger Pass there was snow at the side of the road – and that was at the end of August. While I hope not to see the fluffy white stuff, I do expect low temperature in some of the high passes and mountain ranges.

Last time I wore the Gor-Tex gloves, it was about 25C and I was just so overheated that I had devised a plan to buy a Gor-Tex jacket and then cut and stitch them into something that would go over my regular summer riding gloves. But instead of taking that drastic step, I hit the Internet and stumbled across the Rain Off Overgloves.

They come in two different styles. While both have an independent thumb, one version has the index finger on its own with the other three fingers in a mitt, for lack of better term. I purchased the two-and-two version, which has two fingers in each mitt and an independent thumb.

For the 60-something dollar price tag, I thought it was worth a try. I reasoned it is cheaper than my original thought.

I had to order these online from Farklemaster in Long Island, as the overgloves are not available at motorcycle stores in Canada. I half expected to pay duty on the gloves, but they arrived in just over a week without duty and without getting stuck at customs.

On my way home from work yesterday, the skies started to look ominous. I pulled over just as the rain started. The overgloves fit nicely over my summer gloves, but the problem was how to tighten the drawstring at the top of each glove. I managed to get the right hand one done up just as the rain came down in sheets. To make sure I had a good rain-proof fit, I hooked the end of the drawstring around my handlebar and pulled the toggled tight.

This was impossible for me to do in the pouring rain on my left-hand glove. I couldn’t slide the toggle down far enough to create a loop to go over the handlebar. Eventually I gave up and decided to ride anyway.

The ride home took just over half an hour and I’m happy to say both hands – and riding gloves - stayed dry despite the toggle problem on the left overglove.

My hands did not overheat and I was quite comfortable. I hardly noticed that I had them on. I expect that some riders who do not use all their fingers for clutching and braking would find the overgloves a bit restrictive, especially those who one-finger the brake. Just like any new piece of equipment, it takes a bit of getting used. But the Rain Off Overgloves are just perfect for me.

Before ordering the overgloves, I did a bit of research and found the review on Web Bike World very helpful. They also seemed to have the same problem I did, so I half expected these issues.

I was a bit hesitant when I saw how large the size small is. Admittedly, they could be a bit tighter fit, but it’s not bothersome in the least. If you are looking for dry hands this summer, I highly recommend the Rain Off Overgloves.

Saturday, June 12, 2010

A New Backrest for Under $5

Earlier this week I received a new backrest in mail. After a two hour ride with the backrest in place, I knew my chiropractor would hate what I've done. My back was killing me. The backrest offered no lumbar support and pushed me so far forward that I was nearly touching the tank. Very uncomfortable. So, I need the backrest to move back and lower. A good challenge.

Yesterday, I went to Home Depot to look for new bracket ideas to hold the backrest in place. Lo and behold, the much overlooked l-bracket (corner bracket) came to the rescue. I picked up a set of four 3" X 3/4" zinc brackets. They won't rust, which is a plus.

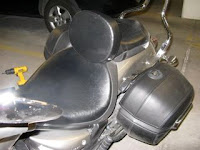
Here's a picture of the bike with the passenger backrest removed. First I removed the front seat (don't get me started on the horrible design of that!) and then undid the two screws that hold the passenger seat to seat bracket. You can find them easily as they are the ones holding down the leather strap that goes across the passenger seat. I'd removed the strap last week, so you won't see it in the picture.


Next, I simply bolted the l-brackets onto the seat using the all the original bolts. No drilling, no fuss. This took me a few minutes as getting under the seat to hold the nuts is a bit of a pain. I tightened everything up and then placed the seat where I wanted it. Now, this is the new seat, not the original passenger seat that came with the bike. I figured that if I mess it up, I'd rather mess up the non-waterproof seat and save the good one.


The new seat simply screws into the brackets. The original seat has a metal backing, so you can't drill into it, but the new seat has a wooden back. I drilled 1/8" pilot holes and then screwed the seat to the l-brackets.

The only problem I had was that I couldn't get the two lower screws in because they are right up against the passenger seat. I'll worry about that once I know I have the seat in a good position and my back doesn't hurt.

Once I've worked out the perfect position, I'll remove the new seat and replace it with the original passenger seat. So I wasted $60 on a crappy seat, but in the end I'll wind up with a great seat for less the $5 it cost me for the l-brackets.

I wanted to make sure my luggage fit with the backrest, so I put most of it on (see below). I will use a 6 foot python lock to hold my luggage down. I thought that using eye hooks instead of regular screws in the backrest would give the python something to lock into. As you can see from the photo below, there isn't enough room for eye hooks. The smaller bag in front of the big one is one of my old saddlebags from the 250. It carries my emergency gear, such as tools, a first aid kit, spare glasses, ear plugs, and the owner's manual. The python goes through that and then through d-rings on the large luggage as well as wrapping around the backrest post. The one thing missing on the bike, besides me, is the tank bag.

Friday, June 11, 2010

Getting Started

In less than two months I'll be on way across the country. I didn't think that getting the bike ready would be a problem as it is only a year old and already has nice, big hardcase saddlebags. Well, I was wrong.

Since I began planning this trip back in March, I've run across several problems, such as what to pack (and not to pack) and how to stay in touch with everyone. Of course selecting proper luggage is part of the issue, which I hope is now solved. So, I have all the luggage, but can I make it all fit on my bike and still carry everything I need?

I'll be gone for about 30 days and ride just over 10,000 km.

That is either going to mean a lot of clothes or a lot of laundry. Frankly, I'd rather spend my time on the road than watching the spin cycle. After much searching, I settled on the biggest piece of luggage I could find, which is the Saddleman BR4100. Apparently, it hold 67 litres of goods. I'm not sure how many t-shirts and jeans that translates into.

Below is the catalogue picture of the luggage. Obviously, I don't have a curved passenger seat, so this will take a bit of farkling to get right.

So far, I've removed the original passenger backrest, which left only the upright post. It looks a bit naked without the backrest, but I will come up with something.

In fact, it took a bit of messing around to get the back rest off. I could plainly see one screw holding it on, but hidden under a plastic plate were two more screws. A quick look on the internet and I discovered the plate is held on by tape. I just popped off the cover with a flathead screwdriver. But why would Yamaha hide screws like that? Not fun for us non-mechanic types.

I made a list of things to get for me (and the bike) as I made up my travel plans. High on the priority list is a backrest.

I found plenty of quick-release backrests, but I really don't see the point of those. After much searching (both in my wallet and online) I found a $60 solution on eBay. It arrived in the mail a couple of days ago. The instructions said it was a 5 minute installation job. Wrong. Including the many times I went up and down 6 flights of stairs for tools I didn't think I'd need, it took an hour and half. If I had just taken all my tools down prior to the backrest project, I'd guess it took about an hour.

To make a long story short, I was out for about two hours yesterday on the bike, and came home with a major backache. This morning, I removed the backrest and am now farkling a farkle. Not sure how I'm going to resolve this issue.

As it is suppose to rain most of the weekend, I'll most likely spend tomorrow getting greasy. With some luck, I'll have the backrest on and comfortable, which, with the help of a python lock, will stabilize my luggage.

I've done a lot of rain-riding this year, so I was really please this morning when my "Rain-off Over Gloves" arrived in the mail today. Finally, (I hope) something that will keep my hands dry without overheating. I don't understand why companies think that it only rains when it's cold. Gor-Tex, if you're reading this, make waterproof, breathable summer gloves. I'm not wearing insulated gloves when it's over 15 C. I'll blog about the over gloves after I've given them a good run for their money.